This is the fourth tutorial in our UFT tutorial series. In this tutorial, we will learn all about various menus found in UFT IDE (Integrated Development Environment).
An integrated development environment (IDE) is a software application that provides comprehensive facilities to computer programmers for software development.
In our case, UFT IDE is the application that you see when you double click on UFT desktop icon to launch the tool.
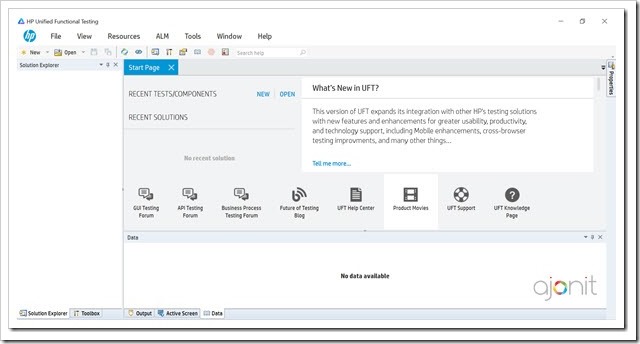
To learn and master UFT, you need to understand everything that happens inside this interface. Inside UFT IDE, we can record and run UFT scripts, write VB Script to enhance recorded scripts, connect to 3rd party tools like ALM and more!
UFT Menus
If you create a new test using File > New > Test, you will see a window similar to this.

Like a typical windows based application, UFT has a:
- Title Bar: Displays the path and name of current open test.
- Menu Bar: Displays the menu available for your IDE. We will discuss in detail all settings and options available in the menu bar.
- Tool Bar: Displays the important options available in menu in the form of buttons. Once you get a hang of UFT, you will be using tool bar buttons often.
Menu Bar
It is always a good idea to start from scratch while learning any new technology. This gives you firm grasp on the concepts and helps you later while you are into more advanced learning. In this section, we will learn all available sub-menus under the Menu bar.
File Menu
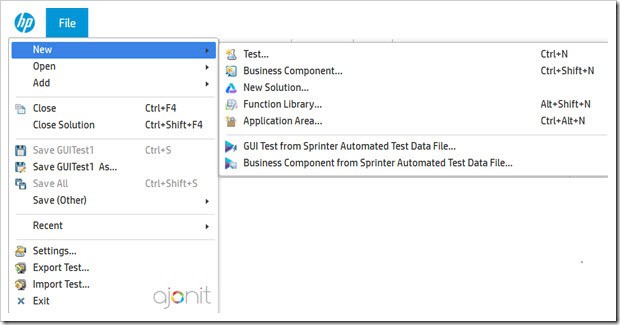
- New: Using File –>New, you can create a new Test, Business Component, Solution, Function Library or an Application Area. We will see each of these in detail in the coming tutorial but for now just remember this location and various document types that can be created in UFT.
- Open: Using this option, you can open an already created Test, Business Component, Solution, Function Library, Application Area or any file type that can be opened in UFT.
- Add: You can add a new Test, Business Component, Function Library, Application Area to a Solution. While we will talk about Solution Pane in detail later, for now think about
Solutionas a binder where you can hold all your testing artifacts at one place for easy access. - Close: Close the currently opened asset in the view. Keyboard shortcut is Ctrl + F4
- Close Solution: Close the Solution. Keyboard shortcut is Ctrl + Shift + F4
- Save <Test Name>: Save the current test.
- Save <Test Name> As…: Save the current test with a different name. GUI tests have an extension .tsp
- Save All: Save all testing documents in the Solution Explorer.
- Save (Other) : Save a test with resources including Active Screen.
- Recent: Shows a list of tests recently opened on your machine.
- Settings: This comes up as a dialog bar and consists some of the most frequently used settings in a UFT test. We will see this option in a detailed separate tutorial later.
- Export Test: Export a test into a zip format.
- Import Test: Import a test from a zip format.
- Exit: Close UFT application.
Edit Menu
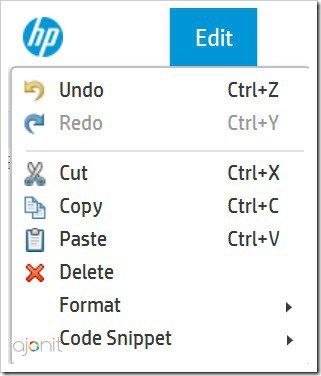 There are some regular options which are found in any windows based application, meanings of which are self evident:
- Undo
- Redo
- Cut
- Copy
- Paste
- Delete
There are two more options which you should note:
- Format: Out of all the options present under Format (as shown below), you would be using Comment and Uncomment more often. Learn
Ctrl+MandCtrl+Shift+Mkeyboard shortcuts by heart.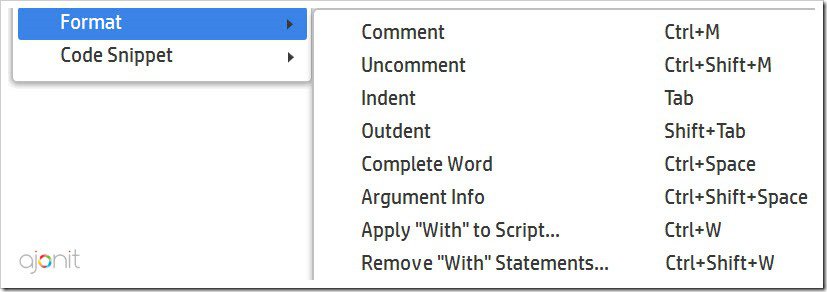
- Code Snippet: This is a helpful tool for
VB Scriptbeginners. Using Code Snippet option, you can quickly copy syntax for various types of conditional and logical statements found in VB Script.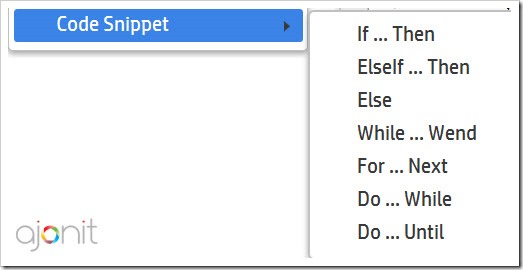
View Menu
This consists of shortcuts to various types of panes found in UFT. UFT panes will be our topic for the upcoming tutorial.
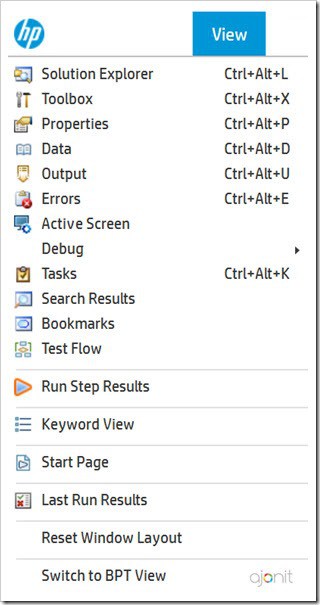
- Solution Explorer
- Toolbox
- Properties
- Data
- Output
- Errors
- Active Screen
- Debug
- Tasks
- Search Results
- Bookmarks
- Test Flow
- Run Step Results
- Keyword View
- Start Page
- Last Run Results
- Reset Window Layout
- Switch BPT View
Search Menu
This sub-menu lets you find and replace keywords in your test or an entire solution. You can even enhance your search using regular expressions. There is another interesting option of Incremental Search and Reverse Incremental Search under this menu. This is like an instant search available for you which shows up the keyword as you type. While Incremental Search starts from the top , Reverse Incremental Search starts from bottom.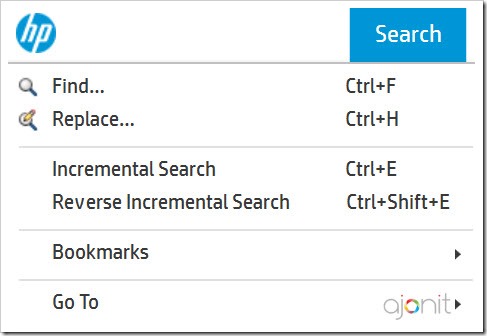
Design Menu
This is one of the most important and frequently used menus in UFT. You would use various options available here to design and build your tests. Each of the options shown in the screenshot will be discussed in detail in the relevant tutorial. 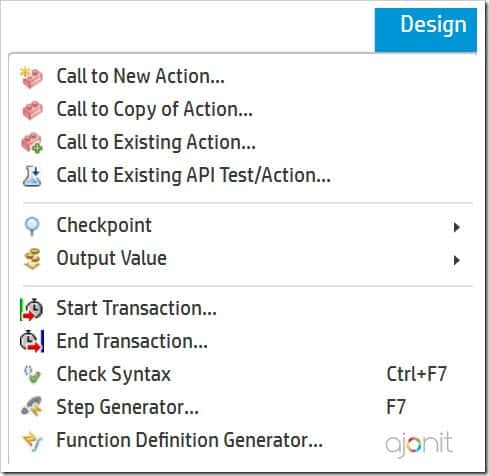
Record Menu
Under Record menu, you will find the Record button, Web Event Recording Configuration and Record And Run Settings 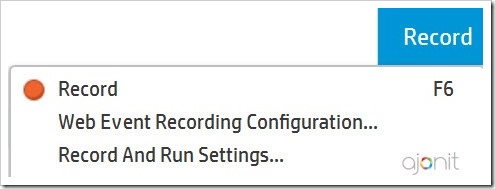
Run Menu
All settings related to Running your tests can be found under Run menu. You can also find options related to inserting and removing breakpoints here. Related: How to fix MS Debugger Error in UFT?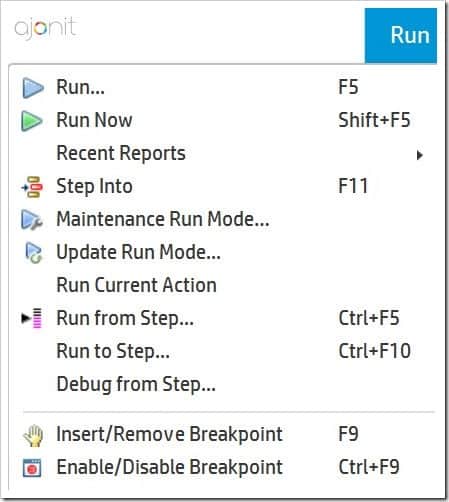
Resources Menu
The heart of UFT is controlled using Resources menu. All settings related to object repositories are available here. 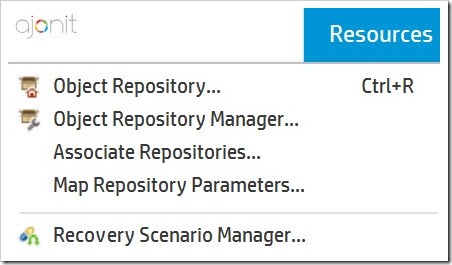
ALM Menu
You can connect HPE ALM tool to UFT and run your UFT tests direct from ALM. This menu option provides a dialog box to connect to the ALM server.
Tools Menu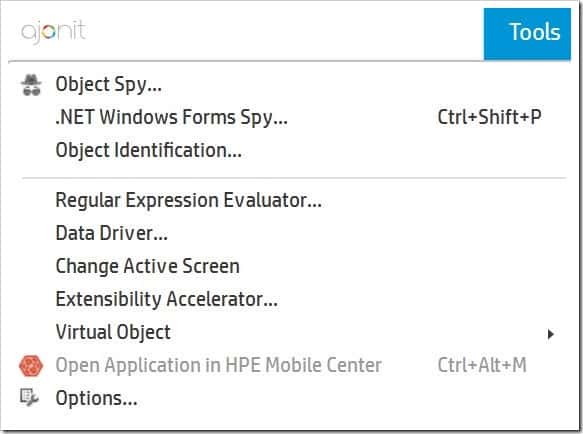
Under tools menu you will find:
- Object Spy: This guy with hat-and-shades will become your friend. You will hang-out on a daily basis with him.
Object Spyis used to find methods and properties available in an object. - .NET Windows Forms Spy: Similar to object spy but works only on Windows forms controls.
- Object Identification: UFT object identification mechanism is located inside this dialog box. You will find settings related to mandatory, assistive properties, Smart Identification and Ordinal identifiers here.
- Regular Expression Evaluator: This was introduced with UFT 11.5. You can quickly validate your regular expressions using this tool.
- Data Driver: One of the ways to data-drive or parameterize your tests.
- Change Active Screen: UFT records screenshot of each and every screen it encounters while recording. These screenshots are known as Active Screens. With this option you can change any active screen.
- Extensibility Accelerator: This is an advanced functionality to extend UFT add-ins support.
- Virtual Object: One of the object identification mechanisms employed when regular object identification fails. Rarely used.
- Open Application in HPE Mobile Center: You would use this for mobile testing using UFT.
- Options: This dialog box consists of several important options related to UFT. We will dedicate an entire tutorial for this.
Window Menu
You can shuffle through open tabs in UFT using Window menu.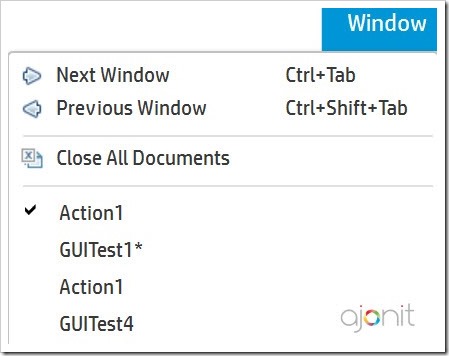
Help Menu
UFT comes with a robust and exhaustive documentation. This menu consist of links to UFT documentation and various official HPE resources.You can find UFT version information under About HP Unified Functional Testing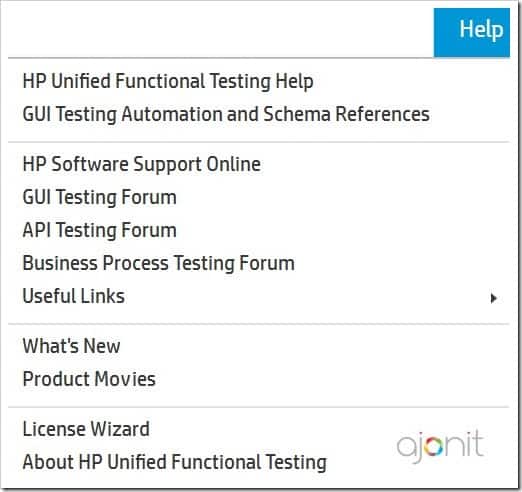
Starting with UFT 14, UFT help files have been moved to online by default.
However, you can still configure the help files so that they can reside on your machine and can be launched using the favorite shortcut F1.
Here are the steps to configure UFT help on your local machine.
- Download UFT 15.0.1 Help file
- The download is in the form of a zip file. Extract the contents to
<UFT installation folder>/help. Most likely the location would beC:\Program Files (x86)\Micro Focus\Unified Functional Testing\help - In UFT, go to Tools > Options > Help and select Access local Help radio button.

With this we come to an end of UFT Menus tutorial. We are slowly and steadily building concepts and moving towards main topics in UFT.
Here is the complete set of tutorials we have covered till now in the UFT tutorial series:
- Tutorial 1: Introduction to software testing
- Tutorial 2: Introduction to UFT
- Tutorial 3: UFT Add-ins and Add-in Manager
- Tutorial 4: All About UFT Menus
- Tutorial 5: Complete Guide to UFT Panes
Enter your name and address below to receive the next tutorial as soon as it is ready.




The same question i want to ask ,may i know the answer?
—-Quote—–
After launching the application, it looks like on your first picture. Menu items Edit, Search, Record, Design and Run are missing. How can I get them to the Menu bar, that it looks like on the second picture?
—Unquote—-
@Vanessa: The instructions have been updated at the top. Thanks for pointing that out.
After launching the application, it looks like on your first picture. Menu items Edit, Search, Record, Design and Run are missing. How can I get them to the Menu bar, that it looks like on the second picture?
As a newcomer in UFT, after read the Tutorial 6, I have got the answer, should u also have known that when “new a test” , the other menu items would be displayed on the menu bar.
Thanks Vanessa. @Mouna – You raised a good point, we have updated the tutorial.