
This is Part4 of QTP and DotNetFactory series by Saket. Refer Part1, Part2,Part3

We have already discussed how to add button control to the form, which we used to confirm/cancel the action or close the form. In this part we will learn how to add various input controls on the form. An Input control can be a text box – to input text data, radio button or check box – to select a option control etc. or a combination of these controls. In this part of series we will discuss on how to add these controls on the form.
Let us start with adding text box control. We can create a text box control using CreateInstance. We will use ‘System.Windows.Forms.TextBox’ type name and ‘System.Wndows.Forms’ assembly.
- Set MyText = DotNetFactory.CreateInstance("
- System.Windows.Forms.TextBox", "System.Windows.Forms")
- The textbox control is created. As discussed in the previous part we will need to place this control on the form. So we will need the user form first then we can add this control using ‘Control. Add’ method.
- Set MyForm = DotNetFactory.CreateInstance("
- System.Windows.Forms.Form", "System.Windows.Forms")
- Set MyText = DotNetFactory.CreateInstance("
- System.Windows.Forms.TextBox", "System.Windows.Forms")
- MyForm.Control.Add MyText
And we can display the form using ‘ShowDialog’. The code will be like
Example 10
- Set MyForm = DotNetFactory.CreateInstance("
- System.Windows.Forms.Form", "System.Windows.Forms")
- Set MyText = DotNetFactory.CreateInstance("
- System.Windows.Forms.TextBox", "System.Windows.Forms")
- MyForm.Controls.Add MyText
MyForm.ShowDialog
This gives you output as

You can see we have added the text box control on the user form, but we have not defined its location on the form. In the same way as we did for the button we position the text box control on the form using System.Drawing.Point
- Set Pos = DotNetFactory.CreateInstance("
- System.Drawing.Point","System.Drawing",x,y)
- Pos.X = 10
- Pos.Y = 20
- MyText.Location = Pos
We can use its different properties like height width, Text, Name etc.
The Text Property can be used to set the text control or to retrieve the text from the text box control. We will use the width property to set the size of text box control and
The code will be like
- Set MyForm = DotNetFactory.CreateInstance("
- System.Windows.Forms.Form", "System.Windows.Forms")
- Set MyText = DotNetFactory.CreateInstance("
- System.Windows.Forms.TextBox", "System.Windows.Forms")
- Set Pos = DotNetFactory.CreateInstance("
- System.Drawing.Point","System.Drawing",x,y)
- Pos.X = 100
- Pos.Y = 100
- MyText.Location = Pos
- MyText.Width = 150
- MyForm.Control.Add MyText
- MyForm.ShowDialog
Now let us add the button control created in the previous part to the user form with text box control to confirm the action or to close the form.
- Set MyButton = DotNetFactory.CreateInstance("
- System.Windows.Forms.Button", "System.Windows.Forms")
As mentioned earlier we will use ‘Text’ Property to retrieve the text entered into text box control.
MyText.Text
The complete code will be like
Example 11
- Set MyForm = DotNetFactory.CreateInstance("
- System.Windows.Forms.Form", "System.Windows.Forms")
- Set MyText = DotNetFactory.CreateInstance("
- System.Windows.Forms.TextBox", "System.Windows.Forms")
- Set MyButton = DotNetFactory.CreateInstance("
- System.Windows.Forms.Button", "System.Windows.Forms")
- Set Pos = DotNetFactory.CreateInstance("
- System.Drawing.Point","System.Drawing",x,y)
- Pos.X = 90
- Pos.Y = 100
- MyText.Location = Pos
- MyText.Width = 100
- Pos.X = 100
- Pos.Y = 130
- MyButton.Location = Pos
- MyButton.Text = "Close"
- MyForm.Controls.Add MyText
- MyForm.Controls.Add MyButton
- MyForm.CancelButton = MyButton
- MyForm.ShowDialog
- Msgbox MyText.Text
- Set MyText = Nothing
- Set MyButton = Nothing
- Set Pos = Nothing
- Set MyForm = Nothing
The output will be

Enter a text in the box and click on Close. This will give the output a message box with text entered


So now you have learnt how to create the custom user form and to place controls on it. We will quickly go through how to add other controls like check box and radio button control.
To add Checkbox control we will use type ‘System.Wndows.Forms.CheckBox’ and the assembly ‘System.Wndows.Forms’ as these controls are part of same assembly.
Set MyCheckbox = DotNetFactory.CreateInstance("
System.Windows.Forms.CheckBox", "System.Windows.Forms")
Our CheckBox Control is created and need to be placed on the user form. To set the location we will use Point object again. We will use its ‘Text’ property to set the Text for checkbox and the ‘Name’ property to set a Name to the control.
Example 12
- Set MyForm = DotNetFactory.CreateInstance("
- System.Windows.Forms.Form", "System.Windows.Forms")
- Set MyCheckbox = DotNetFactory.CreateInstance("
- System.Windows.Forms.CheckBox", "System.Windows.Forms")
- Set Pos = DotNetFactory.CreateInstance("
- System.Drawing.Point","System.Drawing",x,y)
- With Pos
- .X = 90
- .Y = 100
- End With
- With MyCheckBox
- .Location = Pos
- .Text = "My Check Box"
- .Name = “chkCheckBox”
- End With
- With MyForm
- .Controls.Add MyCheckBox
- .Text = "My Custom User Form"
- .ShowDialog
- End With
- Set MyCheckBox = Nothing
- Set Pos = Nothing
- Set MyForm = Nothing
Which gives the output as

No you can see our check box control is created, we will add the button control and place it on the user form.
Set MyButton = DotNetFactory.CreateInstance("
System.Windows.Forms.Button", "System.Windows.Forms")
We can use the ‘Checked’ Method to get the value whether it is checked or not. This method returns a Boolean value – True/False
MyCheckBox.Checked
Combining all together, the code will be like
Example 13
- Set MyForm = DotNetFactory.CreateInstance("
- System.Windows.Forms.Form", "System.Windows.Forms")
- Set MyCheckbox = DotNetFactory.CreateInstance("
- System.Windows.Forms.CheckBox", "System.Windows.Forms")
- Set Pos = DotNetFactory.CreateInstance("
- System.Drawing.Point","System.Drawing",x,y)
- Set MyButton = DotNetFactory.CreateInstance("
- System.Windows.Forms.Button", "System.Windows.Forms")
- With Pos
- .X = 90
- .Y = 100
- End With
- With MyCheckBox
- .Location = Pos
- .Text = "My Check Box"
- .Name = "chkCheckBox"
- End With
- With Pos
- .X = 100
- .Y = 130
- End With
- With MyButton
- .Location = Pos
- .Text = "Close"
- End With
- With MyForm
- .Controls.Add MyCheckBox
- .Controls.Add MyButton
- .CancelButton = MyButton
- .Text = "My Custom User Form"
- .ShowDialog
- End With
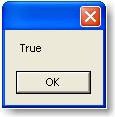
- msgbox MyCheckBox.Checked
- Set MyCheckBox = Nothing
- Set MyButton = Nothing
- Set Pos = Nothing
- Set MyForm = Nothing
The Output will be

Check on the check Box on the user form and click the close button it will pop up a message as ‘True’. It will pop up as ‘False’ if the check box is checked on.
To create Radio button control we will use type name‘System.Windows.Forms.RadioButton’ and the same assembly ‘System.Windows.Forms’.
Set MyRadioButton = DotNetFactory.CreateInstance("
System.Windows.Forms.RadioButton", "System.Windows.Forms")
To define the location of Control on the user form we can use the Point object again. We can use Text Property to identify the object on form
- Set Pos = DotNetFactory.CreateInstance("
- System.Drawing.Point","System.Drawing",x,y)
- With Pos
- .X = 90
- .Y = 100
- End With
- With MyRadioButton
- .Location = Pos
- .Text = "Option 1"
- .Name = "optRadioButton1"
- End With
Now we can Create a Radiobutton on the user form. As Radio buttons are arranged in a group of two or more and allows users to choose one from the set of options in the group, the single radiobutton on the form will be of no use. We need to create at least one more control on the form. In the same way we can create another control.
- Set MyRadioButton1 = DotNetFactory.CreateInstance("
- System.Windows.Forms.RadioButton", "System.Windows.Forms")
- Set MyRadioButton2 = DotNetFactory.CreateInstance("
- System.Windows.Forms.RadioButton", "System.Windows.Forms")
- Set Pos = DotNetFactory.CreateInstance("
- System.Drawing.Point","System.Drawing",x,y)
- With Pos
- .X = 90
- .Y = 100
- End With
- With MyRadioButton1
- .Location = Pos
- .Text = "Option 1"
- .Name = "optRadioButton1"
- End With
- With Pos
- .X = 90
- .Y = 130
- End With
- With MyRadioButton2
- .Location = Pos
- .Text = "Option 2"
- .Name = "optRadioButton1"
- End With
The Checked property of RadioButton control can be used to retrieve which control is selected.
This returns the Boolean value as True/False.
- MyRadioButton1.Checked
- MyRadioButton2.Checked
This property can also be used to set the default option selected. If you need to set the first radio button selected by default then set the property to True
- With MyRadioButton1
- .Location = Pos
- .Text = "Option 1"
- .Name = "optRadioButton1"
- .Checked = True
- End With
Putting it all together
Example 14
- Set MyForm = DotNetFactory.CreateInstance("
- System.Windows.Forms.Form", "System.Windows.Forms")
- Set MyRadioButton1 = DotNetFactory.CreateInstance("
- System.Windows.Forms.RadioButton", "System.Windows.Forms")
- Set MyRadioButton2 = DotNetFactory.CreateInstance("
- System.Windows.Forms.RadioButton", "System.Windows.Forms")
- Set MyButton = DotNetFactory.CreateInstance("
- System.Windows.Forms.Button", "System.Windows.Forms")
- Set Pos = DotNetFactory.CreateInstance("
- System.Drawing.Point","System.Drawing",x,y)
- With Pos
- .X = 90
- .Y = 100
- End With
- With MyRadioButton1
- .Location = Pos
- .Text = "Option 1"
- .Name = "optRadioButton1"
- End With
- With Pos
- .X = 90
- .Y = 130
- End With
- With MyRadioButton2
- .Location = Pos
- .Text = "Option 2"
- .Name = "optRadioButton1"
- End With
- With Pos
- .X = 90
- .Y = 160
- End With
- With MyButton
- .Location = Pos
- .Text = "Close"
- End With
- With MyForm
- .Controls.Add MyRadioButton1
- .Controls.Add MyRadioButton2
- .Controls.Add MyButton
- .CancelButton = MyButton
- .Text = "My Custom User Form"
- .ShowDialog
- End With
- If MyRadioButton1.Checked Then
- msgbox "You have selected - Option 1"
- elseif MyRadioButton2.Checked then
- msgbox "You have selected - Option 2"
- else
- msgbox "No Options Selected"
- End If
- Set MyRadioButton1 = Nothing
- Set MyRadioButton2 = Nothing
- Set Button = Nothing
- Set Pos = Nothing
- Set MyForm = Nothing
This gives the output as

Select an Option and click button, it will pop up the message accordingly

Feel like sharing your ideas with the QTP community? Contact Us


Hi
This articles are very use full.
May I know how to create a Label under the form.
Thanks I learned a lot from these examples. But I am stuck at a position where I need to fire an event from the controls on the form. For example:
If I change a value in ComboBox there should be an event like combobox_SelectedIndexchanged. Could you please send me a code on vaibhavmathur21@gmail.com
I find this information on DotNetFactory quite helpful . I got to learn so many things today.
Thanks a ton!!!!
Really nice article. If we get some more topics on other dotnet controls it will be good. Especially combox.
your’s book is very good ,and its nice
Hi…
Really this helped me alot in order to know what is DOTNET FACTORY? and how to use it?
This article made me to drop the first comment on articles.
Hi Ankur,
Very useful article.
May I also know how to add a list box using DotNetFactory. I would like to pick a value from this list box
Hi,
Even I had similar problem , but then I minimized all the other open application including QTP via programming. By this way the form will be displayed as expected on top of all the open applications.
I have a problem after creating the form. The “MyForm.ShowDialog” will not bring the form to the forefront. Since, it acts as a modal form & until the user intervene with the form, qtp cannot execute any further statement. I want the form to be displayed on top of all opened applications. Any solution???
Hi,
Good Morning.
This is what I am really looking for.
In rational I used to work with dialog boxes and I added a listboxes, check boxes, radio buttons, text boxes and buttons to this custom dialog box.
May I also know how to add a list box using DotNetFactory. I would like to pick a value from this list box and depending on the value I would like to call functions. Can you please email me the code to my personal email.
qtp5659@gmail.com
Hi, How can I enable or disable the text box based on the Radio button i have selected.
Please let me know how can we get the name of the checkbox associated with the checkbox.
In my application there are 10 checkboxes.In the OR each checkbox has the name like “selected_group_107” [“selected_group_” is constant for all checkboxes. ]. My requiremne is to check only one checkbox.
Regular expression is not working.
Is there any way to do it .
Thanks ,
Vamshi
Very nice topics for the grawth of the qtp professionals.
Hi Ankur
Can you explain how to create a Encrypted textbox for Password. i tried using Textbox.PasswordChar property, It is throwing exception
It’s very useful article
thanks
Awesome article…..
Hi Ankur,
Is there a way to get QTP 10.0 , to get the beta version extended beyond the trial period?