This is Part3 of QTP and DotNetFactory series by Saket. Refer Part1, Part2.

Now that you have learned creating custom user form in the earlier parts of this series, we will now see how we can add various controls on it. These controls could be a text box, button, checkbox, radio button etc.
We will start with adding a button control first, let’s understand why we will need a button on the form. Normally we use a command button as a user interface element that provides a simple way to trigger an event or mostly to confirm an action. So if you are creating a user form then it must have some events to trigger with, like you are displaying some information or taking some input, which could be used further in your script.
In the previous example of creating a user form, we have seen that we have created a form without any controls on it. We will now create a button control. The action for this button control will be to close the User form.
Similar to creating a form as in the last part, we will use ‘System.Windows.Forms.Button’ as type name. Button belongs to the same namespace, so we will use ‘System.Windows.Forms’ as assembly and Set statement to create the interface. But first of all we will need a user form on which we can place our control.
Create the user form and button in the same way:
- Set MyForm = DotNetFactory.CreateInstance("System.Windows.Forms.Form", "System.Windows.Forms")
- Set MyButton = DotNetFactory.CreateInstance("System.Windows.Forms.Button", "System.Windows.Forms")
We have created user form and button control, now the button needs to be placed on the user form. Form has a method as ‘Controls. Add’, we will use this to add button control on to the form.
MyForm.Control.Add MyButton
Now as the button is added, we can display the user form using ‘Showdialog’
MyForm.ShowDialog
The code will be like
Example 7
- Set MyForm = DotNetFactory.CreateInstance(
- "System.Windows.Forms.Form", "System.Windows.Forms")
- Set MyButton = DotNetFactory.CreateInstance(
- "System.Windows.Forms.Button", "System.Windows.Forms")
- MyForm.Controls.Add MyButton
- MyForm.ShowDialog
This will gives you output as
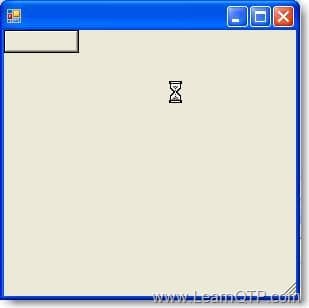
It was so simple, but it is not finished yet. We need to have some text on button to identify it and its purpose. Also it must have to be placed at some proper location other wise whatever controls we add further will go the same location and our form will be of no use. Also it will give a better look to the user form.
Button also has some properties which we can use, like Height, Width, Text, Location, Enabled etc. Here we will use ‘Text’ property to set the caption of button.
MyButton.Text = "Close"
To set the location we will use ‘Location’ Property. But here we will need to understand how we can set the location as it will require co-ordinates (X and Y) to exactly point the location on screen. To set position we will need to have another object of position, which will set directly to the button property. For this we will use ‘System.Drawing’ Namespace. Let’s create a Position first with Set statement again using ‘System.Drawing.Point’ as type name and assembly would be ‘System.Drawing’.
Set Pos = DotNetFactory.CreateInstance("System.Drawing.Point","System.Drawing",x,y)
You can see here we have passed arguments this time as x and y because System.Drawing.Point type requires integer value for x- and y- coordinates that defines a point in two dimensional planes. So we need to pass these values and set it to the property ‘Location’.
- Pos.X = 100
- Pos.Y = 100
- MyButton.Location = Pos
That’s it, we have now done with the text and location of button. But when you run this you will see that this is not yet functional. Forms has two properties ‘AcceptButton’ and ‘CancelButton’ to allow users to click a button by pressing the ‘Enter’ or ‘ESC’ keys. ‘CancelButton’ property closes the form when the button is clicked or ‘ESC’ key pressed. If you use ‘CancelButton’ property then the button will be clicked and your form will be closed but if you use ‘AcceptButton’ property then your form does not close.
As we have kept this button to close the form, we will now make this button of type ‘Cancel’ which will enable this button to close the form.We will use ‘CancelButton’ property of Form to do this
MyForm.CancelButton = MyButton
Below is the complete code
Example 8
- Set MyForm = DotNetFactory.CreateInstance(
- "System.Windows.Forms.Form", "System.Windows.Forms")
- Set MyButton = DotNetFactory.CreateInstance(
- "System.Windows.Forms.Button", "System.Windows.Forms")
- Set Pos = DotNetFactory.CreateInstance(
- "System.Drawing.Point","System.Drawing",x,y)
- With Pos
- .X = 100
- .Y = 100
- End With
- With MyButton
- .Text = "Close"
- .Location = Pos
- End With
- With MyForm
- .Controls.Add MyButton
- .CancelButton = MyButton
- .Text = "My Custom User Form"
- .ShowDialog
- End With
- msgbox "User Form Closed"
- Set MyForm = Nothing
- Set MyButton = Nothing
- Set Pos = Nothing
When you will run this, it will give you output as
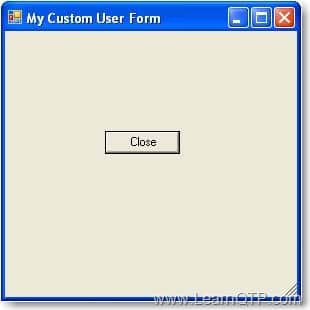
Clicking the button will close the user form. And as we have a statement to output a message box after the ‘ShowDialog’ statement, it will pop up a message box once our user form is closed.
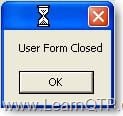
Further to this we will now see what if we need more than one button on the user form. I will explain this in a simple way using ‘DialogResult’.
DialogResult represents the result of the form. If the form is displayed as a dialog box, setting this property with a dialog result value sets the value of the dialog box result for the form. We are using our custom form as a dialog box, so we can use this property to get the result from the from. We can set the DialogResult property of button, which is assigned to the DialogResult property of a form when clicked on the button. To retrieve the COM interface for this we can use ‘System.Windows.Forms.DialogResult’ from ‘System.Windows.Forms’ assembly.
Set dResult = DotNetFactory.CreateInstance("System.Windows.Forms.DialogResult", "System.Windows.Forms")
Let us create a form with two button control and clicking on each button will give us output accordingly.
Continuing the above example we will add one more button on our user form and place it beside the first button. I will rename the button object created above as MyButton1 and create another with MyButton2.
- Set MyButton1 = DotNetFactory.CreateInstance(
- "System.Windows.Forms.Button", "System.Windows.Forms")
- Set MyButton2 = DotNetFactory.CreateInstance(
- "System.Windows.Forms.Button", "System.Windows.Forms")
- With Pos
- .X = 50
- .Y = 100
- End With
- With MyButton1
- .Text = "Close"
- .Location = Pos
- .DialogResult = dResult.Cancel
- End With
- With Pos
- .X = 150
- .Y = 100
- End With
- With MyButton2
- .Text = "OK"
- .Location = Pos
- .DialogResult = dResult.OK
- End With
You can see we have assigned the result for dialog using DialogResult Property of button. For Button1 we have assigned Cancel and for Button2 we have assigned OK. Similarly we can use different enumeration as well like Yes, No, Ignore etc, By default it is None.
Now when a button is clicked on the form the form will be closed and dialog result will be assigned to Form. Which we can get using the DialogResult property of Form.
- If MyForm.DialogResult = dResult.OK Then
- msgbox "OK Button Pressed"
- else
- msgbox "Close Button Pressed"
- End If
Putting it all together
Example 9
- Set MyForm = DotNetFactory.CreateInstance(
- "System.Windows.Forms.Form", "System.Windows.Forms")
- Set MyButton1 = DotNetFactory.CreateInstance(
- "System.Windows.Forms.Button", "System.Windows.Forms")
- Set MyButton2 = DotNetFactory.CreateInstance(
- "System.Windows.Forms.Button", "System.Windows.Forms")
- Set dResult = DotNetFactory.CreateInstance(
- "System.Windows.Forms.DialogResult", "System.Windows.Forms")
- Set Pos = DotNetFactory.CreateInstance(
- "System.Drawing.Point","System.Drawing",x,y)
- With Pos
- .X = 50
- .Y = 100
- End With
- With MyButton1
- .Text = "Close"
- .Location = Pos
- .DialogResult = dResult.Cancel
- End With
- With Pos
- .X = 150
- .Y = 100
- End With
- With MyButton2
- .Text = "OK"
- .Location = Pos
- .DialogResult = dResult.OK
- End With
- With MyForm
- .Controls.Add MyButton1
- .Controls.Add MyButton2
- .Text = "My Custom User Form"
- .ShowDialog
- End With
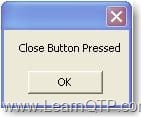
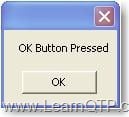
- If MyForm.DialogResult = dResult.OK Then
- msgbox "OK Button Pressed"
- else
- msgbox "Close Button Pressed"
- End If
- Set MyForm = Nothing
- Set MyButton1 = Nothing
- Set MyButton2 = Nothing
- Set dResult = Nothing
- Set Pos = Nothing
This gives the output as
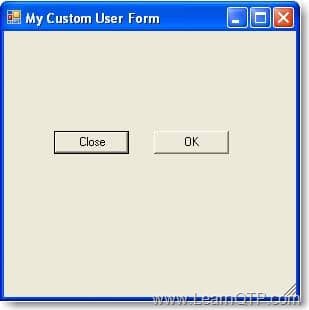
Clicking on Close button gives output as
Clicking on OK button gives output as
Keep subscribed to LearnQTP.com, there are more interesting articles to come in this series!


Nice article.
Valuable information !Thanks a lot Ankur
Any chance that it is possible to add more then 5 buttons to a page?
Thanks Saket,
Can You please share more code related to Grouping of some Fields and their Properties.
I want to display a group of fields only one perticulor radio button is selected.
Aslo I would like to see more code about Label and its Properties.
I tried Mybutton to set as AcceptButton and set dialogresult = dresult.ok for it so that on clicking
Mybutton the form should not close and some fields on the form should get enabled.
But I observed if Dialogresult is set with AcceptButton the form closes.
Is there any way to keep the form open and set some fields visible on clicking Mybutton.
Nice article.. ankur.. i have following query..
In Visual Studio.Net .. i have a code to display a text box after clicking a Button.. Can anyone please tell me how to code that in QTP …
Sample Visual Studio .Net code:( want to convert this code for QTP)
Public Class Form1
Private Sub Button1_Click(ByVal sender As System.Object, ByVal e As System.EventArgs) Handles Button1.Click
TextBox1.Visible = True
End Sub
End Class
Thank You Ankur..! Its very helpful
In above example why ‘Close’ is always highlighted?
Very good article it help lot…..
This is very good article
This is very good article
Thank you ..thnx a lot..great job done
Example 9 is what i was waiting for…